
Teleporting yourself anywhere during video meeting
During these quarantine days people are mostly sitting in front of their computers having several video conference calls a day. The environment they sit in is often a bedroom or living room with a boring wall behind them. Let’s try to change it and have fun with teleporting you for instance to the Star Wars.
Introduction
The story
Recently, I friend of mine has sent me a nice article written by Benjamin Elder.
Once I saw that blog post I told myself: “whatever it takes, I have to try this out!”. The author describes how to change the image coming from webcam and use it in video conference. He uses convolutional neural network called BodyPix to segment person on the image and adds star wars background with the person showing up like hologram. Cool, isn’t it?
There is however a drawback. Your computer must be equipped with NVIDIA graphics card in order to run the CNN model. Sadly, my computer does not contain such a card and I wanted to find a solution.
Running model on CPU
Running a model on CPU is always a pain since it suffers from high inference time (the time it takes to process one image). Fortunately, there exist models which are small enough to perform well on devices with low computation power or CPUs.
After a quick research I found open source repository called Human-Segmentation-PyTorch which is exactly what I was looking for:
- Segmentation of person
- Several pretrained models available
- Models fast enough giving reasonable latency (FPS)
Installing dependencies
Clone repository
$ git clone --recursive https://github.com/AntiAegis/Human-Segmentation-PyTorch.git
$ cd Human-Segmentation-PyTorch
$ git submodule sync
$ git submodule update --init --recursive
Create virtual environment
$ virtualenv -p python3.6 venv
$ source venv/bin/activate
Install requirements
$ pip install pyfakewebcam==0.1.0
$ pip install -r requirements.txt
$ cd models/pytorch-image-models && python setup.py install
Install and configure v4l2loopback
$ sudo apt install v4l2loopback-dkms
$ sudo modprobe -r v4l2loopback
$ sudo modprobe v4l2loopback devices=1 video_nr=20 card_label="v4l2loopback" exclusive_caps=1
Download weights of pretrained model you like
Check models that are described in the README. Download weights of the model you would like to run. Take CPU time into account, so the model predicts as fast as possible.
Do not forget to download environment background you would like to teleport into!
Let’s kick it off
The script below will do the job. Most of the code is taken from from Benjamin’s blog.
I’ve modified it to work with the repository we cloned in previous steps.
There is an option ONLY_DISPLAY
which you can set to True if you want to only display image in opencv window.
Do not forget to
- set the path of background to variable called
background - set the path of model’s weights to variable called
weights_path
I’m using ICNet with ResNet18 backbone, but it’s up to you which one you choose.
import cv2
import numpy as np
import pyfakewebcam
import torch
from torch.nn import functional as F

from models import ICNet
from dataloaders import transforms
from utils import utils


ONLY_DISPLAY = False


def get_mask(frame):
    image = frame[..., ::-1]
    h, w = image.shape[:2]

    # Predict mask
    X, pad_up, pad_left, h_new, w_new = utils.preprocessing(image, expected_size=input_sz, pad_value=0)
    with torch.no_grad():
        mask = model(X)
        mask = mask[..., pad_up: pad_up+h_new, pad_left: pad_left+w_new]
        mask = F.interpolate(mask, size=(h, w), mode='bilinear', align_corners=True)
        mask = F.softmax(mask, dim=1)
        mask = mask[0, 1, ...].numpy()

    return mask


def post_process_mask(mask):
    mask = cv2.dilate(mask, np.ones((10, 10), np.uint8), iterations=1)
    mask = cv2.blur(mask.astype(float), (30, 30))
    return mask


def shift_image(img, dx, dy):
    img = np.roll(img, dy, axis=0)
    img = np.roll(img, dx, axis=1)
    if dy > 0:
        img[:dy, :] = 0
    elif dy < 0:
        img[dy:, :] = 0
    if dx > 0:
        img[:, :dx] = 0
    elif dx < 0:
        img[:, dx:] = 0
    return img


def hologram_effect(img):
    # add a blue tint
    holo = cv2.applyColorMap(img, cv2.COLORMAP_WINTER)
    # add a halftone effect
    bandLength, bandGap = 2, 3

    for y in range(holo.shape[0]):
        if y % (bandLength+bandGap) < bandLength:
            holo[y, :, :] = holo[y, :, :] * np.random.uniform(0.1, 0.3)

    # add some ghosting
    holo_blur = cv2.addWeighted(holo, 0.2, shift_image(holo.copy(), 5, 5), 0.8, 0)
    holo_blur = cv2.addWeighted(holo_blur, 0.4, shift_image(holo.copy(), -5, -5), 0.6, 0)
    # combine with the original color, oversaturated
    out = cv2.addWeighted(img, 0.5, holo_blur, 0.6, 0)
    return out


def get_frame(cap, background_scaled):
    _, frame = cap.read()
    mask = get_mask(frame)
    mask = post_process_mask(mask)
    frame = hologram_effect(frame)
    # composite the foreground and background
    inv_mask = 1-mask
    for c in range(frame.shape[2]):
        frame[:, :, c] = frame[:, :, c]*mask + background_scaled[:, :, c]*inv_mask
    return frame


height, width = 720, 1280
input_sz = 320

# change model here if you would like to
model = ICNet(backbone='resnet18', num_classes=2, pretrained_backbone=None)
weights_path = 'ICNet_ResNet18.pth'

trained_dict = torch.load(weights_path, map_location='cpu')['state_dict']
model.load_state_dict(trained_dict, strict=False)
model.eval()


# setup access to the *real* webcam
cap = cv2.VideoCapture('/dev/video0')
cap.set(cv2.CAP_PROP_FRAME_WIDTH, width)
cap.set(cv2.CAP_PROP_FRAME_HEIGHT, height)
cap.set(cv2.CAP_PROP_FPS, 60)


# setup the fake camera
fake = pyfakewebcam.FakeWebcam('/dev/video20', width, height)


# load the virtual background
background = cv2.imread('background.jpg')
background_scaled = cv2.resize(background, (width, height))


# frames forever
while True:
    frame = get_frame(cap, background_scaled)

    if ONLY_DISPLAY:
        cv2.imshow('result', frame)
        cv2.waitKey(1)
    else:
        # fake webcam expects RGB
        frame = cv2.cvtColor(frame, cv2.COLOR_BGR2RGB)
        fake.schedule_frame(frame)
Run this script from the root of cloned repository
$ python script.py
BAM! The result should look like this.
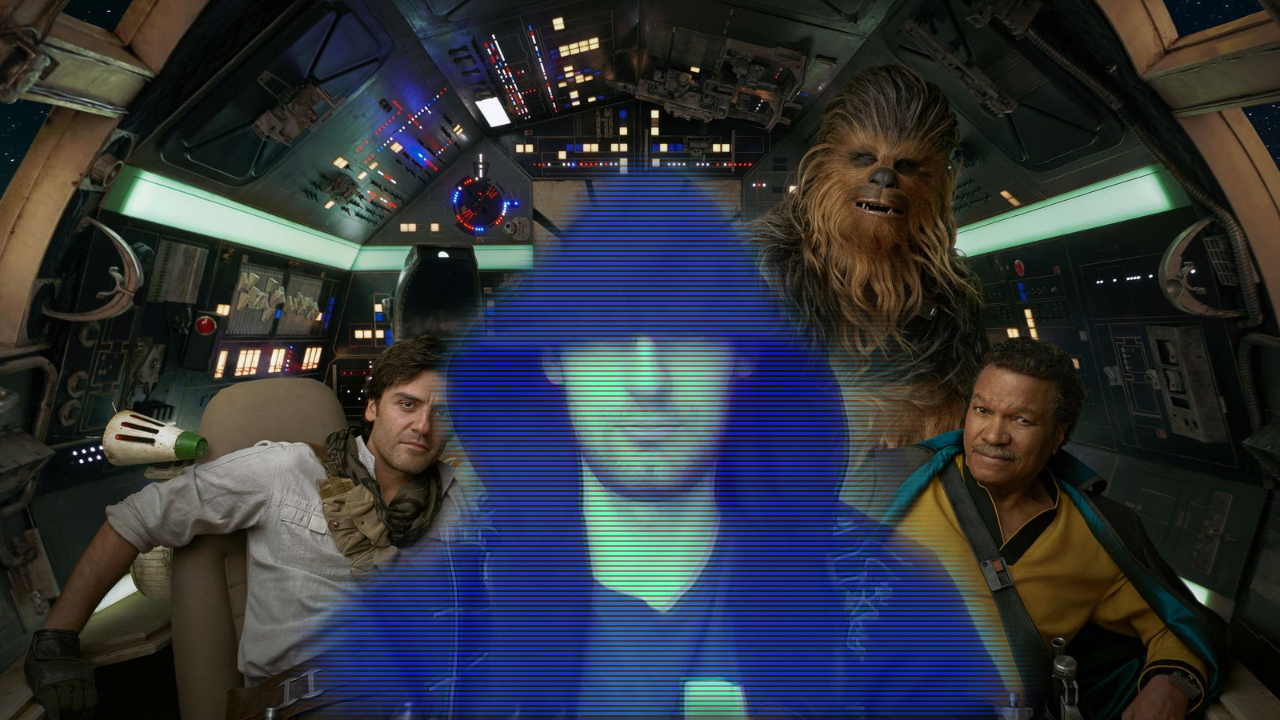
May the Force be with you!
Thanks to Marek Suppa for reviewing the article.